
Accidentally sent the wrong email? Forgot to attach a file? Sent something too soon? Microsoft Outlook offers a useful feature called email recall that can help in these situations. It allows you to take back a sent message under the right conditions.
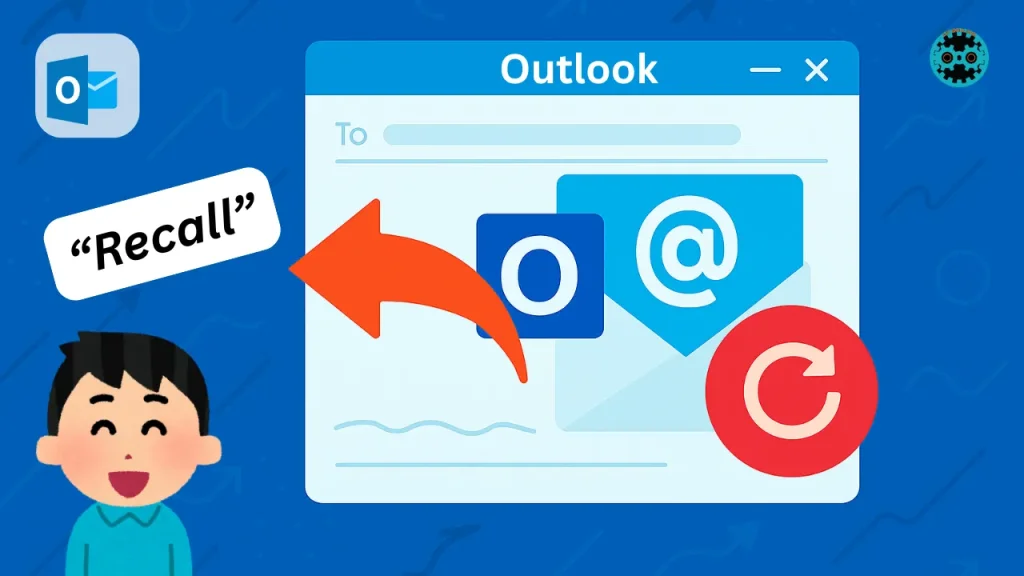
This guide will walk you through exactly how to recall an email in Outlook. It keeps things simple, clear, and focused on what you need to do to successfully recall a message. Whether you want to delete an email from the recipient’s inbox or replace it with a corrected version, this article shows you how.
Conditions Required for Email Recall to Work
Outlook’s recall function has some requirements. These must be met for the recall to succeed:
- Both you and the recipient must be using Microsoft Outlook on Windows.
- You must be using an Exchange or Microsoft 365 account.
- The recipient’s mailbox must be on the same Exchange server.
- The recipient must not have opened the email yet.
- The email must be in the recipient’s Inbox.
- You must use the desktop version of Outlook for Windows.

If any of these conditions aren’t met, the recall may not work. For example, if the recipient has already read the email, recall will fail. If they are using Outlook Web or a non-Outlook client (like Gmail or Apple Mail), it also won’t work. Click the link to get Microsoft 365 for free
Step-by-Step Guide to Recalling an Email in Outlook
Here’s a complete, easy-to-follow guide to help you recall an email in Microsoft Outlook for Windows. Each step is explained in detail so that you can understand exactly what to do and how to do it, even if you're new to Outlook.
Step 1: Open Microsoft Outlook
Start by launching the Outlook desktop app on your Windows computer. This feature is only available in the desktop version of Outlook. It will not work if you're using Outlook Web (browser-based), the mobile app, or the Mac version.
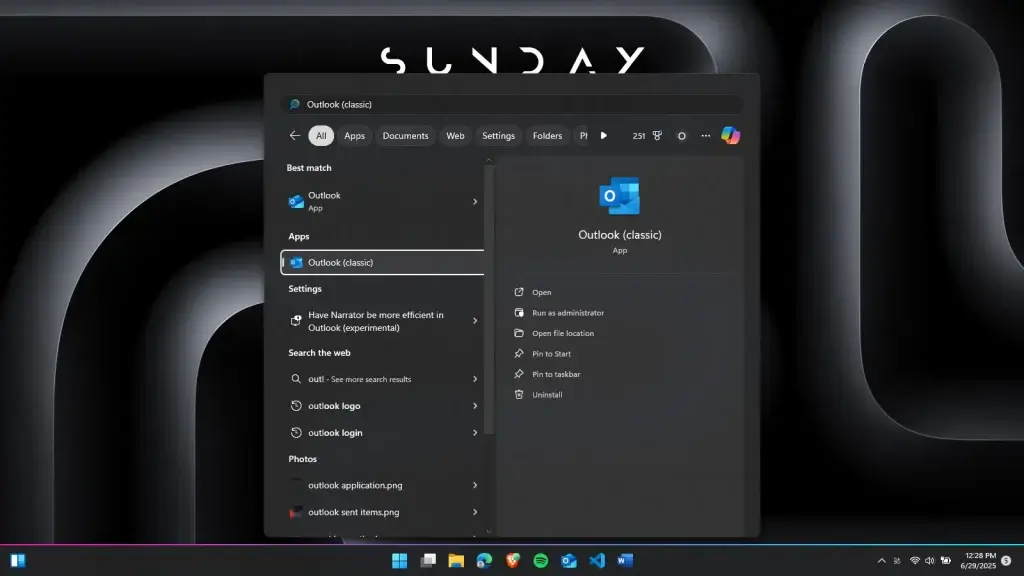
To open Outlook:
- Click the Start menu (usually located at the bottom-left corner of your screen).
- Type “Outlook” into the search bar.
- Click on the Microsoft Outlook app from the search results.
Make sure you are signed in to the correct Outlook account, the one you used to send the email you want to recall.
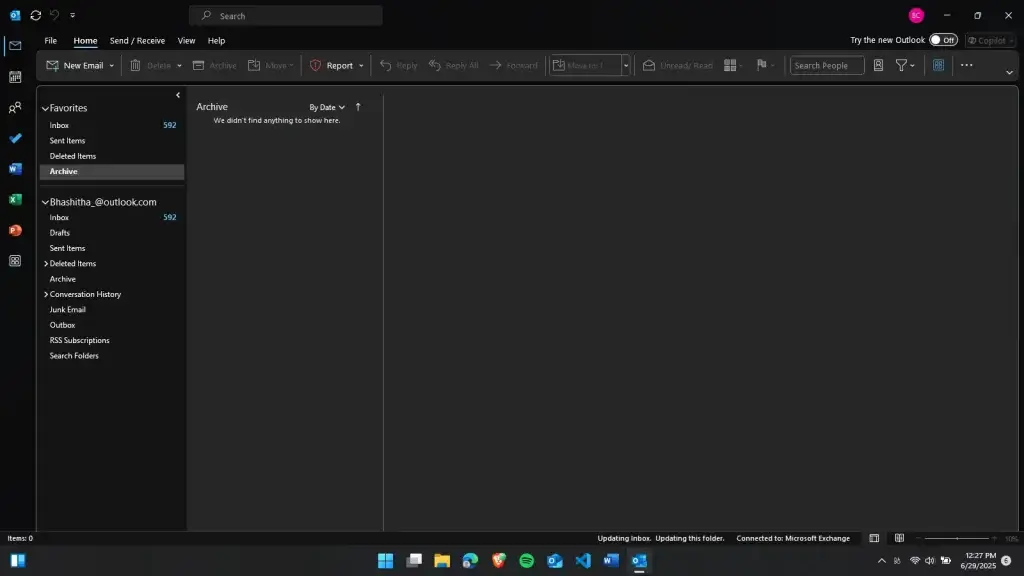
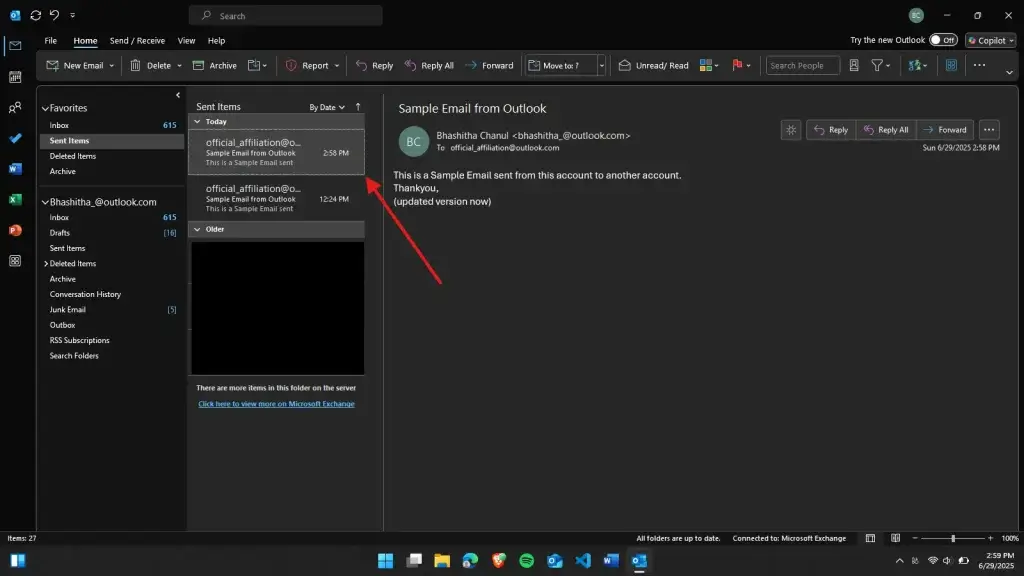
Step 2: Go to the “Sent Items” Folder
After Outlook opens, look at the left-hand side of the window. This is your folder pane, where you can see folders like Inbox, Drafts, and Sent Items.
Click on Sent Items. This folder stores all the emails you have sent.

Depending on how many emails you send, it might take a few seconds to load. You may need to scroll or use the search bar at the top to quickly find the message you're looking for.
Step 3: Find and Open the Email You Want to Recall
Once you're inside the Sent Items folder, browse through the list of emails to find the one you want to recall. Double-check the subject line, recipients, and send time to make sure you’ve selected the right message.
Now, double-click the email. This will open it in a separate window.
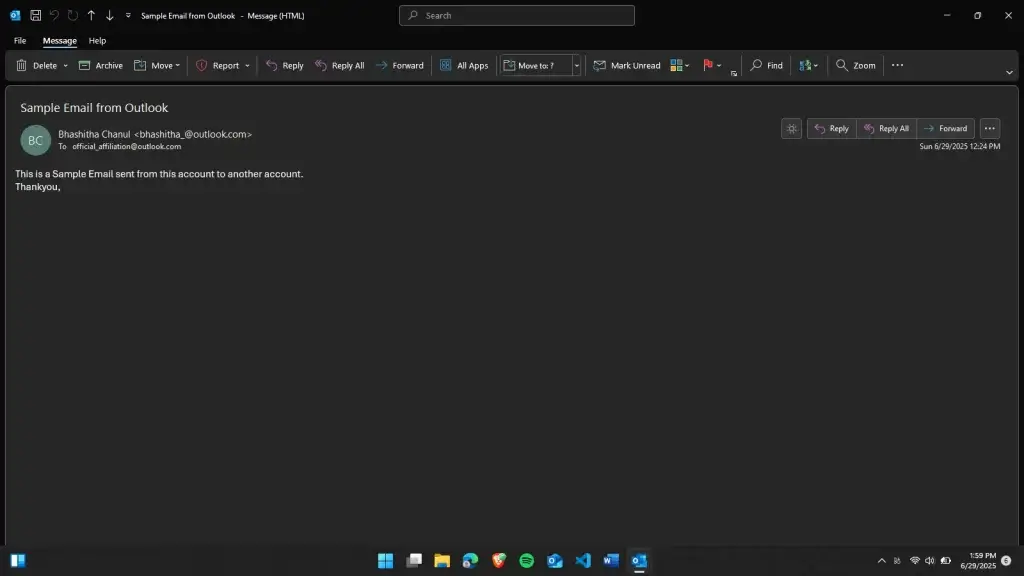
Important: You must open the email in its window. If you try to recall the message from the preview pane, the recall option will not appear.
When the message opens in a new window, you'll see its toolbar (called the “ribbon”) at the top. This is where you’ll find the recall option.
Step 4: Click the “3 dots” Tab in the Message Window
At the top-right corner of the newly opened message window, you’ll see 3 dots. Click it.
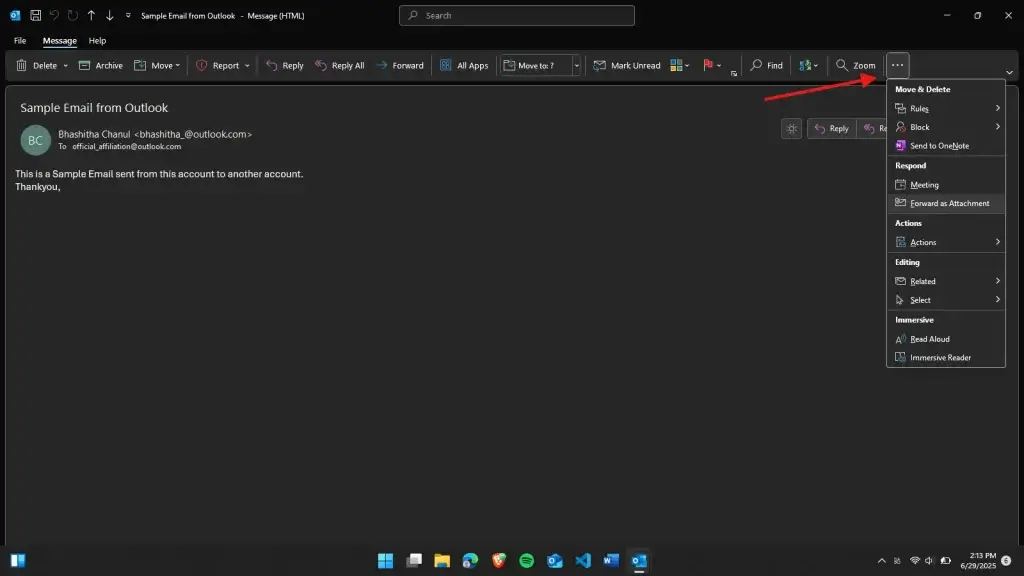
This will open a menu that applies only to that email message, not your entire Outlook app. The 3 dots provide message-specific tools, such as saving, printing, and, most importantly, recalling a message.
Step 5: Click “Resend or Recall” and Then “Recall This Message.”
Inside the 3-dot menu, look for the “actions” section (depending on your version of Outlook and Windows platforms such as Windows 11).
In that section, find and click "Resend or Recall". This may appear as a button with a small redo sign and an envelope icon.

Clicking it will open a drop-down list. From that list, select "Recall This Message".
⚠️ If you don’t see “Recall This Message,” check that:
- You opened the message in a new window.
- The message was sent from your Outlook desktop app.
- Your email account is part of a Microsoft Exchange or Microsoft 365 organization.
Clicking "Recall This Message" opens a pop-up window with two action options.
Step 6: Choose Between Deleting or Replacing the Message
In the pop-up window that appears, you will see two choices:
- Delete unread copies of this message
Select this if you want to simply remove the email from the recipient’s inbox before they read it. - Delete unread copies and replace with a new message
Choose this if you want to send a corrected version of the email. A new window will open with your original message, allowing you to edit and resend it.
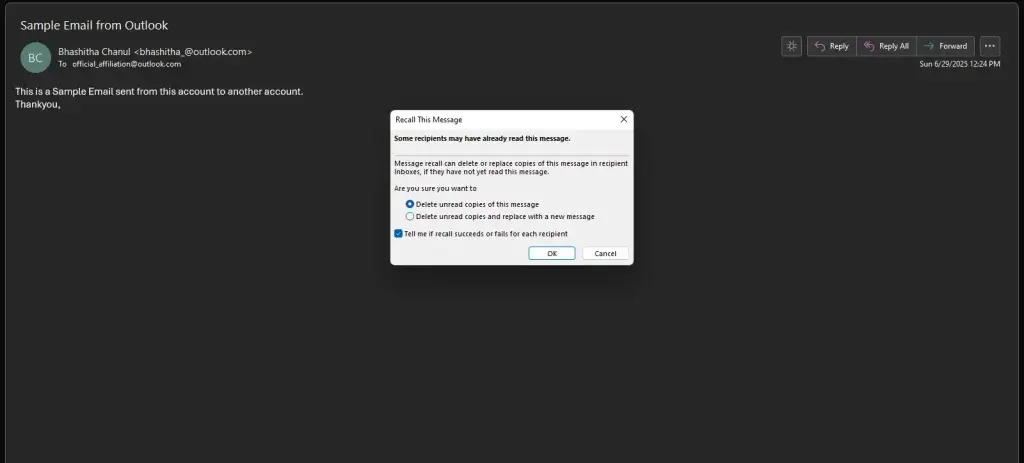
If you're correcting a mistake, like fixing a typo or attaching a forgotten file. The second option is the better choice.

Make your selection by clicking the corresponding option.
Step 7: (Optional) Choose to Get Recall Notifications
Below the two main recall choices is a checkbox labeled:
- Tell me if recall succeeds or fails for each recipient
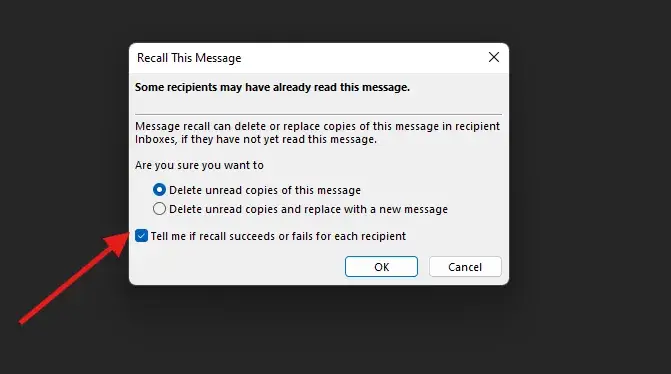
If you check this box, Outlook will send you email notifications for each person the message was sent to. These notifications will tell you whether the recall was successful or not.
This is especially useful if you send an email to multiple people and want to track who still received it.
Step 8: Click “OK” to Start the Recall Process
After selecting your preferred option and whether you want notifications, click the OK button.
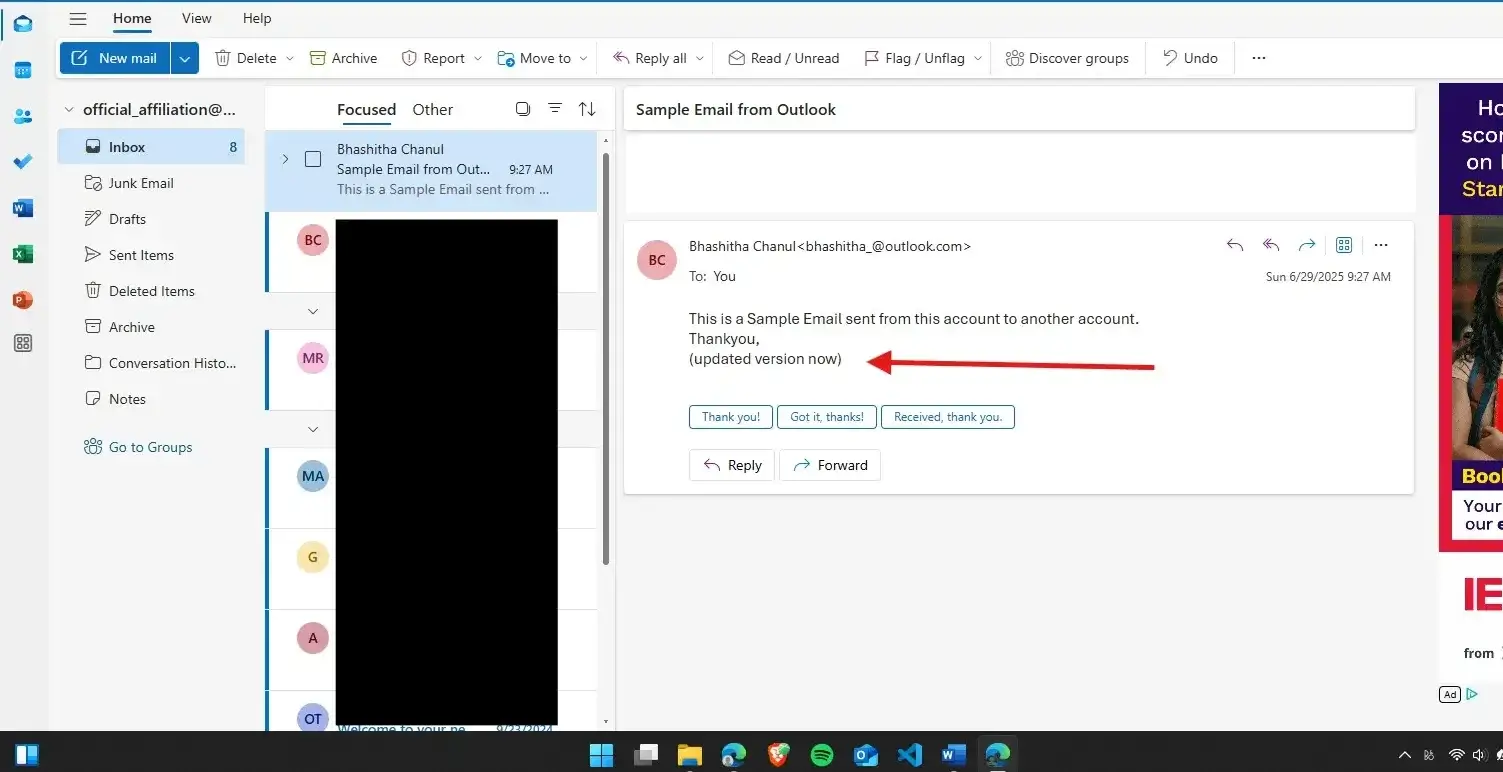
If you choose the option to replace the message, a new message window will open containing your original email. Make any necessary changes (such as correcting the content or attaching a file), then hit Send to send the updated version.
What Happens After You Recall an Email?
When you initiate a recall, Outlook attempts to retrieve the message from the recipient’s inbox. What happens next depends on several factors.
If the Recall Is Successful:
- The original message is removed from the recipient’s inbox.
- If you choose to replace the message, the updated version is delivered instead.
- You may receive a message in your inbox confirming that the recall was successful.
If the Recall Fails:
- The recipient will still see the original message.
- In many cases, they will also receive a message indicating that you attempted to recall the email.
- If you choose to replace the message, the new version may still be delivered, but the original one remains as well.
Reasons an Email Recall Might Fail
Outlook email recalls are useful but not foolproof. Here are common reasons why recalls may fail:
1. The Email Has Already Been Opened
Once the recipient opens the email. Even just clicks on it in the reading pane. The recall is immediately invalid. The original message will remain in their inbox.
2. The Recipient Uses a Different Email Client
If the recipient uses a mail client other than Microsoft Outlook, such as Apple Mail or Thunderbird, the recall will not work.
3. The Email Was Moved
If the recipient has set up a rule that moves incoming mail to a folder other than the inbox, the recall might not find the original message.
4. The Email Was Sent to Someone Outside Your Organization
Recall typically only works within the same Microsoft Exchange or Microsoft 365 organization. Emails sent outside your company’s domain are not eligible.
5. The Email Was Sent from Outlook Web or Mobile App
The recall feature is only available in the full Windows desktop app. Emails sent from Outlook Web or a mobile device cannot be recalled.
How Do You Know If the Recall Worked?
After attempting a recall, you may receive an email from Outlook informing you of the result. This message will tell you if the recall was successful for each recipient.
Sometimes, you won’t get a message right away. Outlook will keep trying for a short time, especially if the recipient’s Outlook is not currently open. But if the recipient eventually opens the original message before the recall goes through, it will still fail.
Keep in mind: recall results vary depending on the recipient’s settings, email activity, and software.
Best Practices for Using Email Recall
While recalling an email is a helpful tool, it’s not something you should rely on regularly. Instead, it’s best to use it only in urgent situations. Here are some practical tips to help ensure your recall attempts are more likely to succeed:
- Act quickly: The sooner you recall an email, the better the chances.
- Use it within your organization: Recall works best when everyone is on the same Outlook Exchange system.
- Keep messages short and to the point: If the email has a mistake, the recipient may read it quickly before a recall has a chance.
- Avoid using recall for sensitive or critical information unless necessary.
Summary
Here’s a quick summary of how to recall an email:
- Open Outlook for Windows.
- Go to the Sent Items folder.
- Double-click the message you want to recall.
- Click File > Resend or Recall > Recall This Message.
- Choose to delete or replace the message.
- Confirm your selection and click OK.
Outlook will then attempt to remove or replace the email, and you may receive notifications indicating whether it was successful.

Web content writer of Get Basic Idea