Splitting cells is a technique used to extract information from one cell to many cells. This technique is beneficial when working with the data imported to Excel from other sources. This step-by-step guide will provide you with enough information about the methods to split cells in Excel.
Let's see one by one.
Method 1: Splitting Cells using Text to Columns Feature
[g_article_ads]
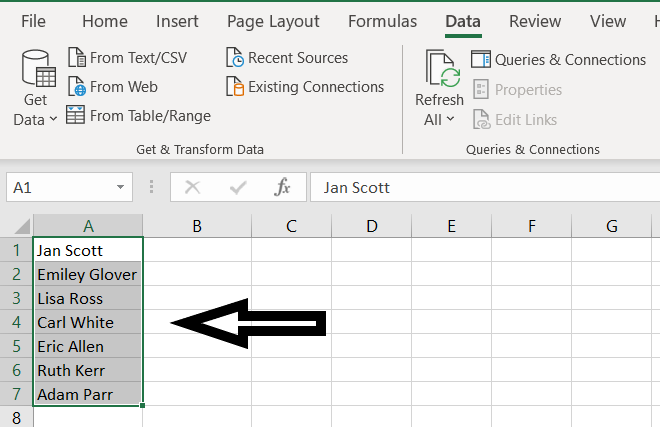
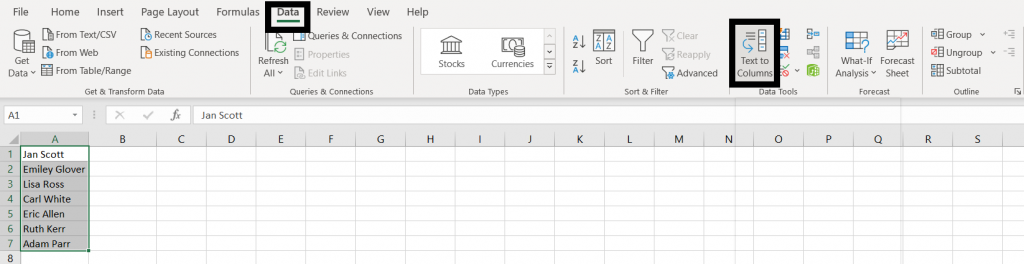
- First, select the whole range of the data you want to split.
- Then go to the Data tab and select the Text to Columns button in the Data Tools group.
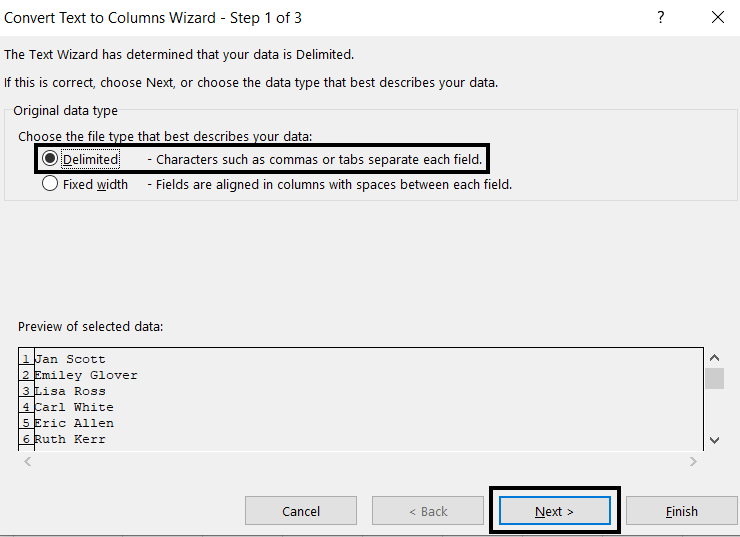
- The following dialogue box will appear. Click on the Delimited file type and press Next.
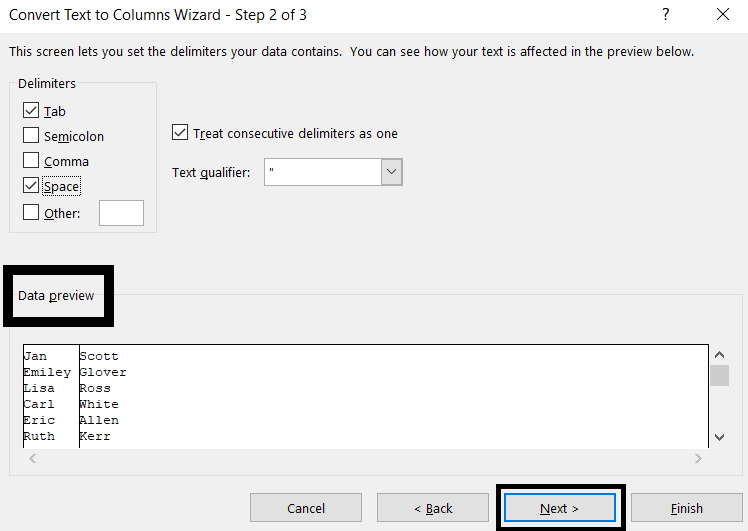
- This dialogue box lets you set the delimiters the data contains. You can select any options according to your preference. You can check various delimiter types and preview them in the Data Preview section. Then press Next.
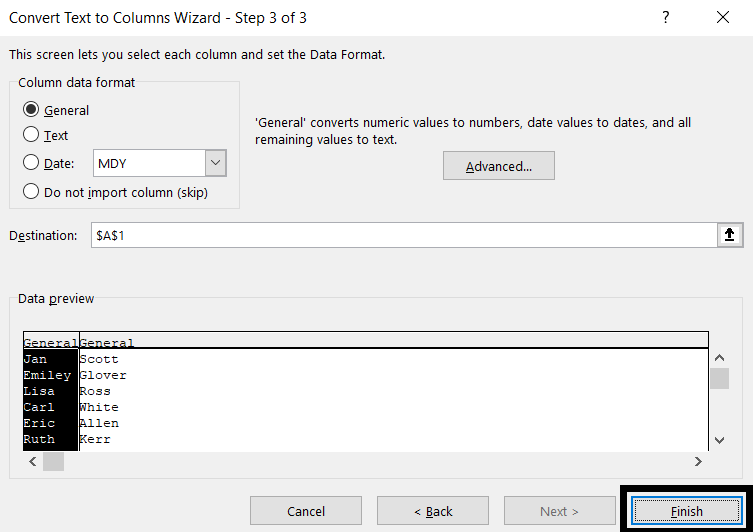
- This dialogue box lets you set the Data Format for each column. If you want, you can select any format or allow it by default. Then press Finish.
Method 2: Splitting Cells using Flash Fill Feature
[g_article_ads]
Since the Flash Fill method introduced in 2013, it is available in the latest versions of Microsoft Excel. Working with Flash Fill is like performing magic. So, we can quickly split the data. You need to create some extra columns to use this method. Let's see the steps.
- To use this method, first split the data in the first column into multiple columns.
- Then go to the Data tab and click the button Flash Fill or you can do this by using the shortcut key Ctrl+E. You will see that all the first names have been inserted automatically in the adjacent columns.
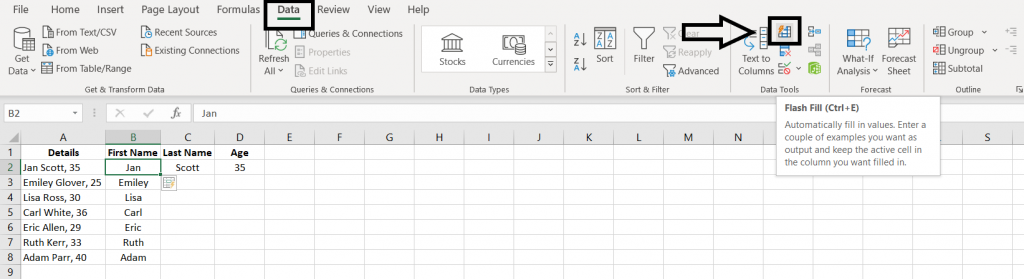
- Carry out the same process for all the other columns.
Method 3: Standard Excel Formulas to Split Cells in Excel
Formulas are powerful and flexible methods. If the original data changes, the formula result updates automatically.
Before moving on to formulas, you need to know some of the handy text functions required to create a formula in Excel.
- LEFT() – Returns the specified number of characters from the start of a string
- RIGHT() – Returns the specified number of characters from the end of a text string
- MID() – Returns the characters from the middle of a text string, given a starting position and length
- LEN() – Returns the number of characters in a text string
- SEARCH() – Returns the number of the character at which a specific character or text string
- FIND() – Returns the starting position of one text string within another text string
- SUBSTITUTE() – Replace existing text with new text in a text string
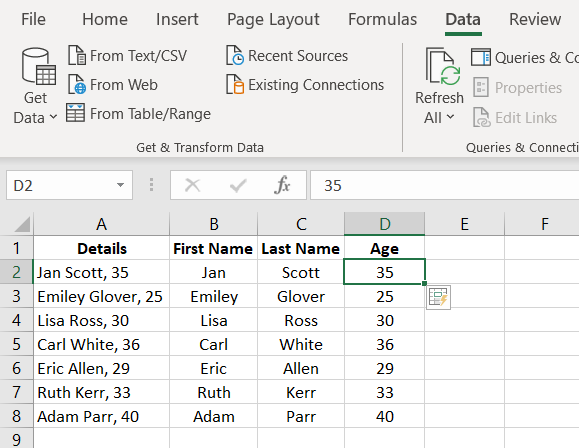
As we got a reasonably clean data set, we will use some of those functions to separate the text into three separate columns.
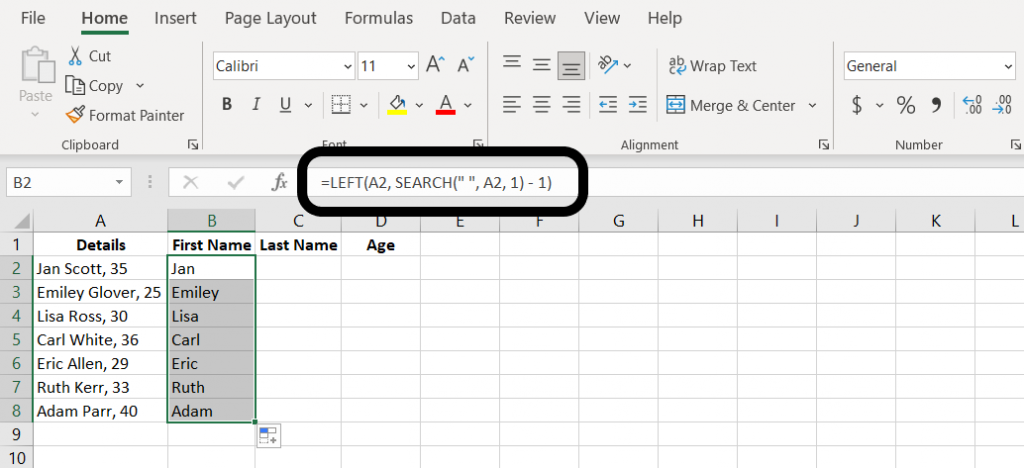
Step 1:
[g_article_ads]
This formula will return the First Name.
Click the B2 cell and write " =LEFT(A2, SEARCH(" ", A2, 1) – 1) " in the Formula Bar and press Enter. Then double click the fill handle to copy down the formula for the rest of the cells.
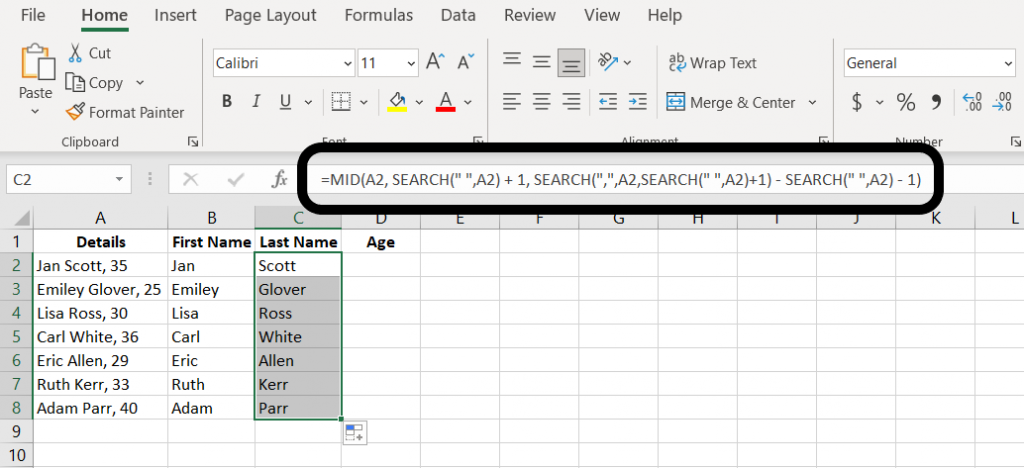
Step 2:
This formula will return the Last Name.
Click the C2 cell and write " =MID(A2, SEARCH(" ", A2) + 1, SEARCH(",", A2, SEARCH(" ", A2) +1) – SEARCH(" ", A2) – 1) " in the Formula Bar and press Enter. Then double click the fill handle to copy down the formula for the rest of the cells.
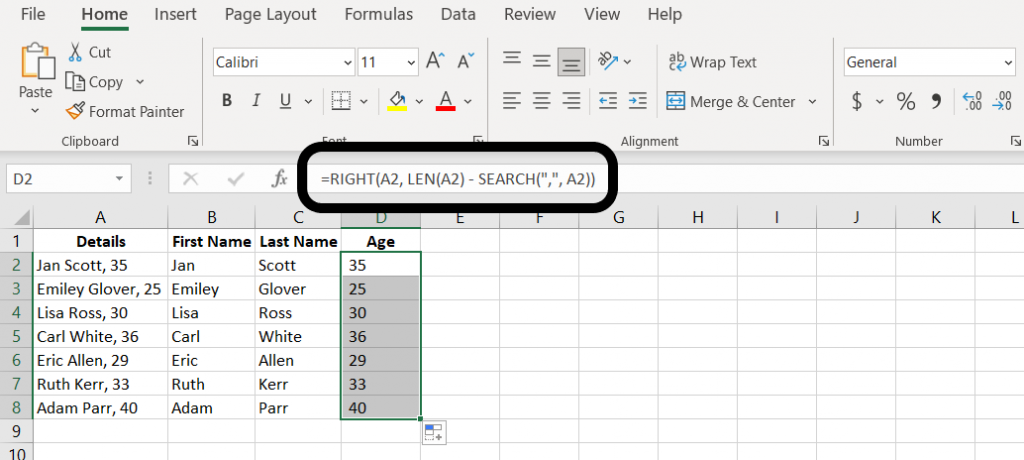
Step 3:
This formula will return the Age.
Click the D2 cell and write " =RIGHT(A2, LEN(A2) – SEARCH(",", A2)) " in the Formula Bar and press Enter. Then double click the fill handle to copy down the formula for the rest of the cells.
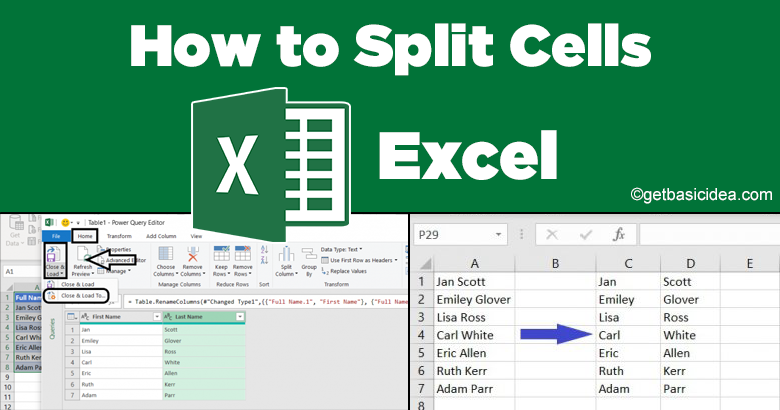
Method 4: Power Query Method to Split the Cells
[g_article_ads]
This method has been natively available since Excel 2016.
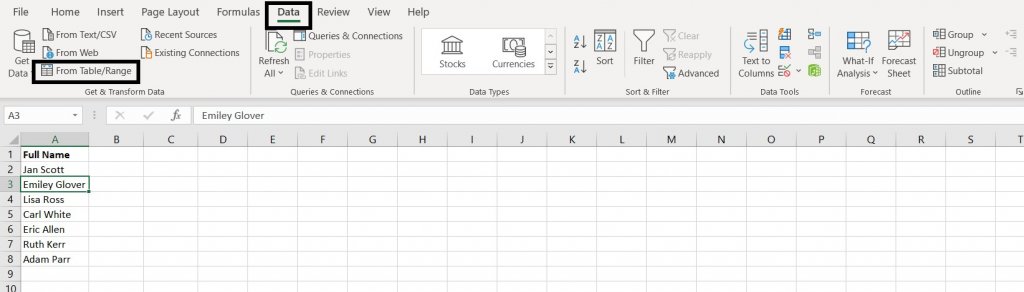
- First, you need to select any cell within the data. Then go to the Data tab and select the From Table/Range option.
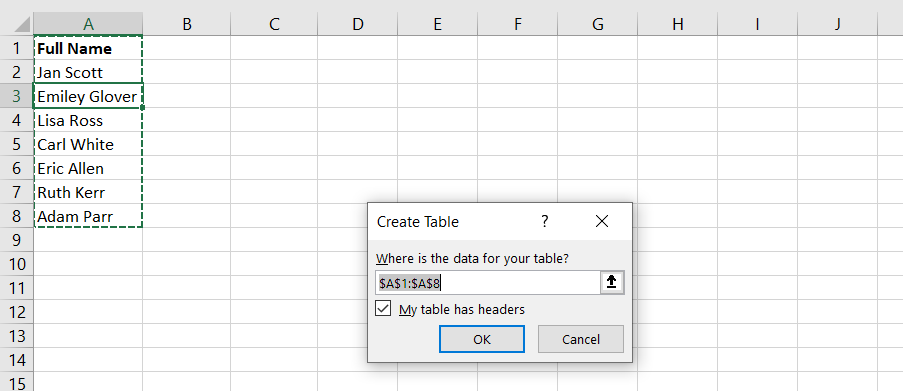
- Excel recognizes that the data is not currently in the table structure. So, it asks you to create a table. Click OK to create one automatically.
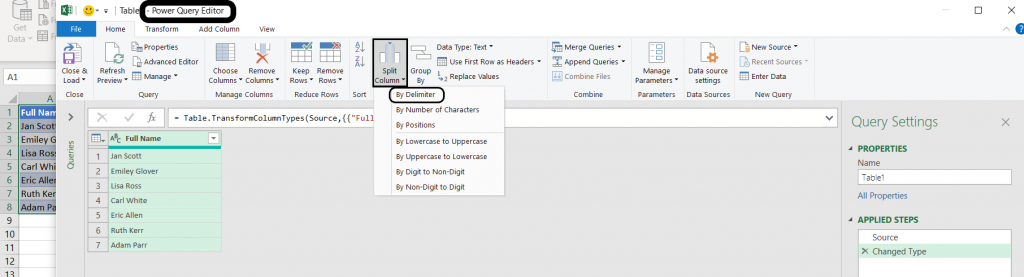
- Now the Power Query Editor is opened. Then go to Split Column and select the option By Delimiter.
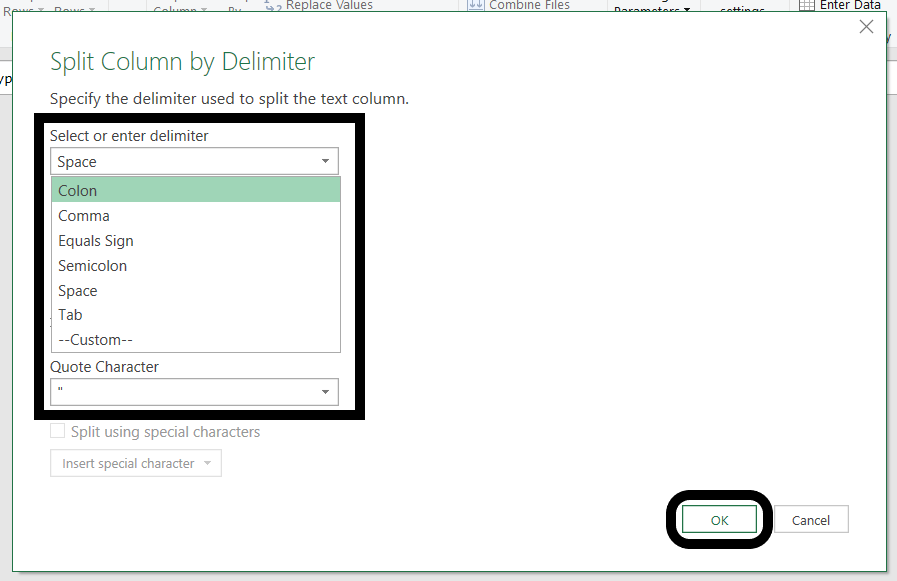
- There are lots of delimiters available here. You can choose one depending on the complexity of the data. Then click OK.
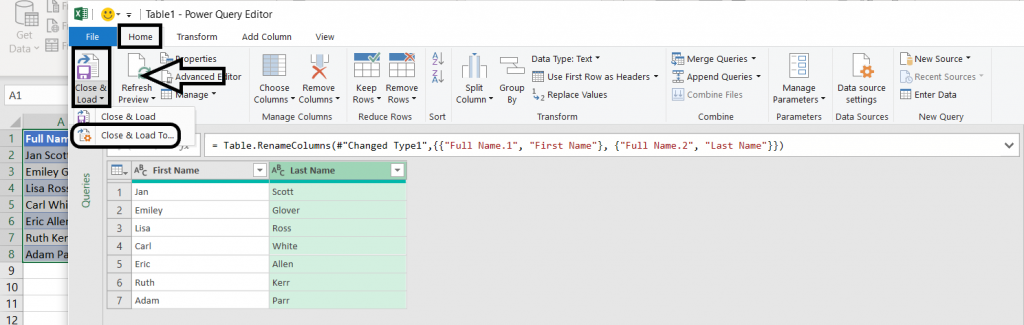
- Now, the Full name column has split into first name and last name. Change the headers by double-clicking them. Then select the Home menu, go to the Close & Load tab, and select the Close & Load To option.
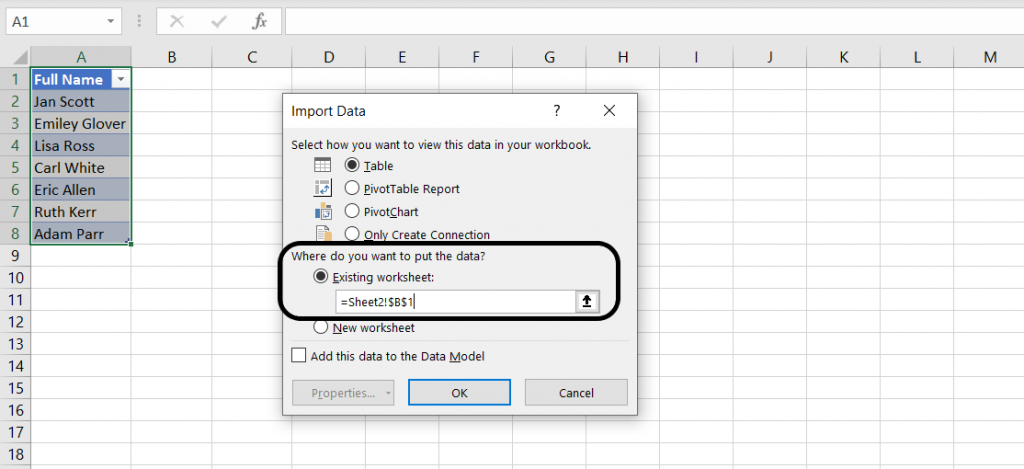
- From the Import Data window, select the Existing worksheet and choose a destination to place the output data. That is going to load as a table. Then click OK.
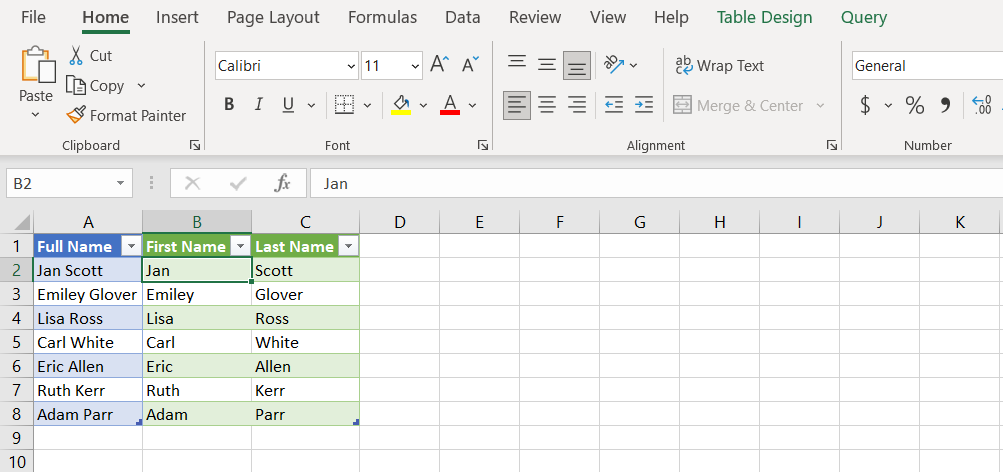
- There we go.
Now the data has been loaded back into Excel.
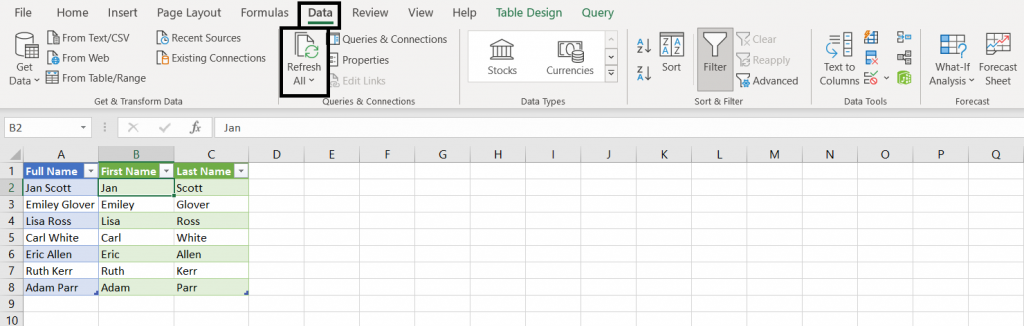
- If the source data changes or more data has added to the table, you can go to the Data tab and click Refresh All, and the data will update.
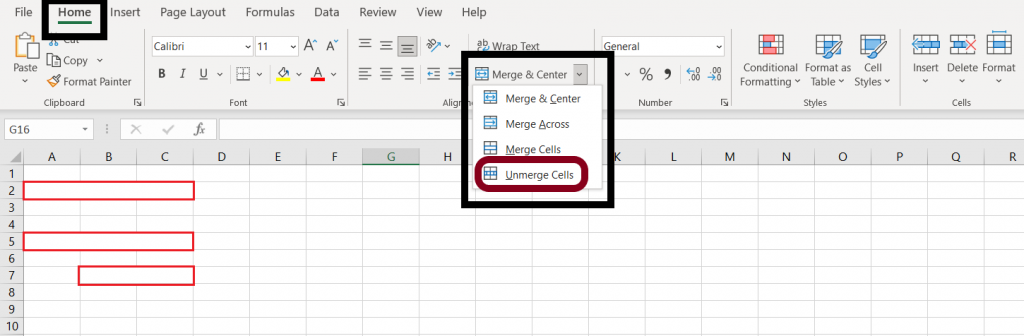
Method 5: Splitting the Cells using the Unmerge Option
[g_article_ads]
When working with imported data sets, we may find that some cells have merged. But for our work, we do not require them. You can use Unmerge Cells option to split the cells.
- To use this method, first select the merged cell. Then go to the Home tab and select the Unmerge Cells option.
- You can only split the cells by using this method. You cannot extract the data into many cells. Follow one of the four methods mentioned above to separate the data.
I hope you all have understood about Split the Cells in Excel. I'll meet you all soon with more exciting content.
Author of Get Basic Idea / Undergraduate at University of Moratuwa.