Reconciliations will give a clear picture of the accuracy of the work we are doing. Bank reconciliation is one of the prime reconciliation done by a company. Microsoft Dynamics Navision allows users to import bank statements to the system. You could eliminate manual entry works and improve the quality of data by importing statements to the system. Will look at how to import a bank statement to Microsoft Dynamics Navision.
Pre-setup to do in Bank Statement
- When receiving a bank statement from the bank, the user has to convert it to a CSV format type. This file can be imported into the system.
- If the bank sent the bank statement in PDF format, convert it to Excel initially.
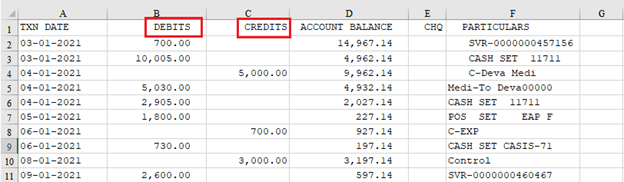
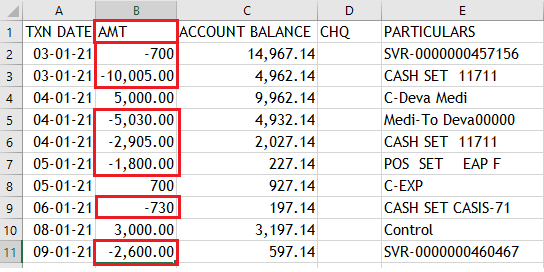
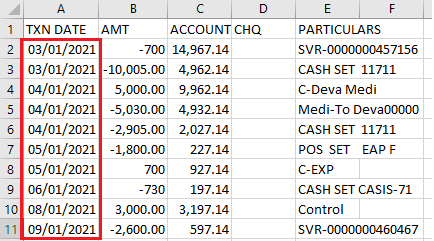
Bank will make debit entries for the payments made by the company, and credit entries for the receipts taken by the company. When the bank presents payment entries as positive values in the bank statement user must change the values in column "DEBITS" to negative.
Amounts should be brought, to one column, therefore combine columns "DEBITS" and "CREDITS" and save the file under the format of "Comma Separated Values" [CSV (Comma delimited) (*.csv)].
Before importing a bank statement to Navision, the user should configure importing setup in the bank card.
Pre-setup to import bank statement to Microsoft Dynamics Navision
[g_article_ads]
- Login to "Navision".
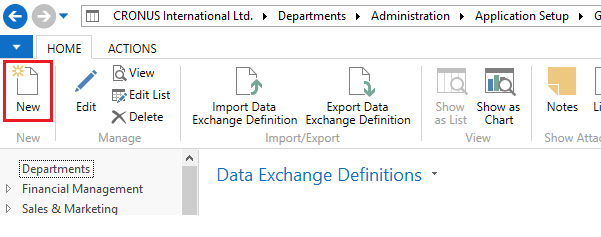
- Type "Data Exchange Definitions" in the search bar.
- Click the suggested link.
- Click "New" to create a data exchange definition in the system.
Mandatory fields to be filled in each fast tabs.
General Fast Tab
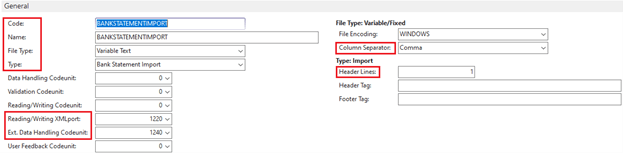
- Type a code for import configuration setup in the "Code" field.
- Type "Description" of the code in the "Name" field.
- Select "Variable Text" in the "File Type" field.
- Select import type as "Bank Statement Import" in the "Type" field.
- Select "Comma" in the "Column Separator" field.
- Select "1220" XML port in the "Reading/Writing XML Port" field.
- Select "1240" Codeunit in the "Ext. Data Handling Codeunit" Field
- Select "1" in the "Header Lines" field.
Column Definitions Fast Tab
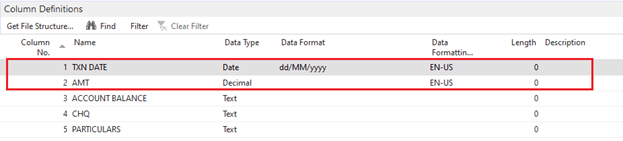
- Give details of the columns in the "Name" field.
- Make sure that, following the sequence of column same as per the CSV file.
- If "Date" is given as a data type, make sure that "Data Format" and "Data Formatting Culture" fields are filled.
- If "Decimal" is given as a data type, make sure that the "Data Formatting Culture" field is filled.
- Follow the same formatting mentioned in the image.
- Make sure that, the date format is followed in the CSV file as well.
Line Definitions Fast Tab
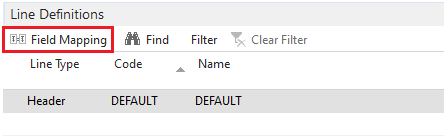
Click "Field Mapping" option to map bank statement line pane.
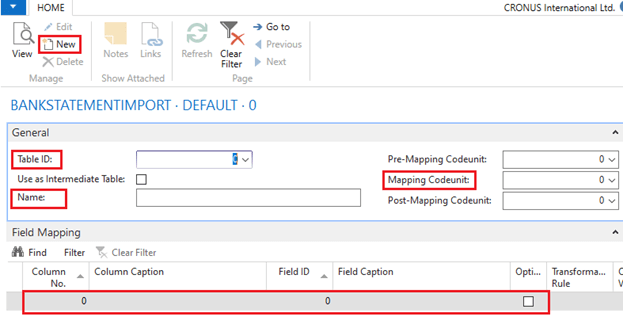
- Select "274" in the "Table ID" field.
- Give "Description" in the "Name" field.
- Select "1248" in the "Mapping Codeunit" field.
- Make the connection between the column that the user has in the CSV file and system fields. In the "Field Mapping" fast tab and select column no. Select field ID, which is matching with the column no user has selected.
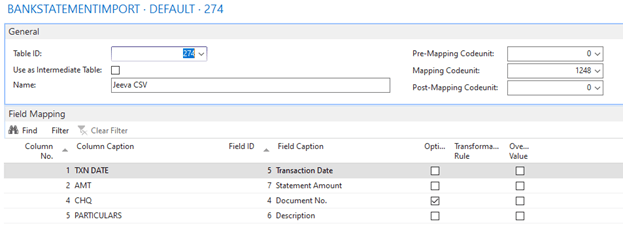
- Tick on "Optional" bullion if any columns don't have values in the cell.
- Click "Ok" to close the field mapping window.
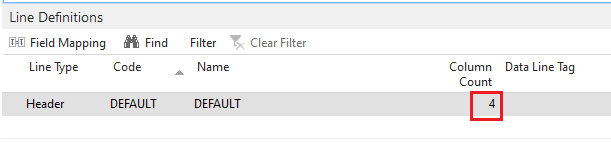
Put the count of columns that the user has selected in the "Field Mapping" window in the "Column count" field.
Bank Export/Import Setup
[g_article_ads]
Specifies the data exchange setup records that are created using the Data Exchange Framework to enable export or import of bank files.
- Type "Bank Export/Import Setup" in the search bar.
- Click the suggested link.
- Click "New" to add data exchange setup.

- Specifies a "Code" for Bank Export/Import format.
- Specifies a "Name" for Bank Export/Import format.
- Select "Import" in the "Direction" column.
- Select "1270" in the "Process Codeunit ID" column.
- Select the "Data exchange definition code" user has created to import bank statements in the "Data Exch. Def. Code" column.
- Click "Ok" to close the "Bank Export/Import Setup" window
Bank Account Setup
- Type "Bank Accounts" in the search bar.
- Click the suggested link.
- Select the bank account which should import a bank statement to the system.
- Click "Edit" to open the bank card.
- Go to the "Transfer" Fast tab.
- Select relevant "Bank Export/Import Format" in the "Bank Export Import Format" field.

Import Bank Statement to Microsoft Dynamics Navision
[g_article_ads]
- Type "Bank Account Reconciliations" in the search bar.
- Click the suggested link.
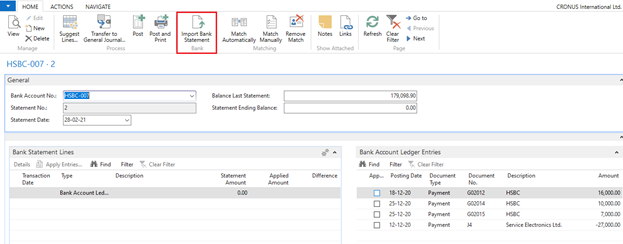
- Click "New" to create new bank reconciliation.
- Select relevant bank account no in the "Bank Account No" field.
- Type "1" in the statement no field. If the user already posts any bank reconciliation system will generate the latest bank statement no as per the sequence.
- Click the "Import Bank Statement" action in the ribbon.
Make sure that, you have closed the CSV file while importing. If not you may come across below error.
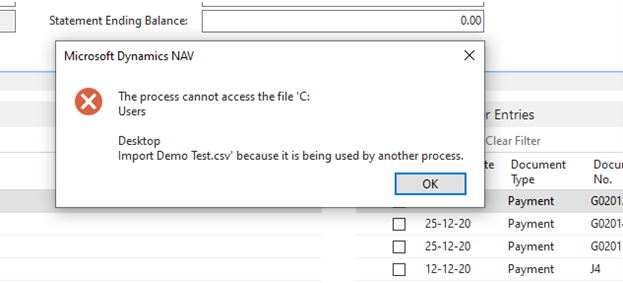
After importing bank statement to the system user can continue with reconciliation.
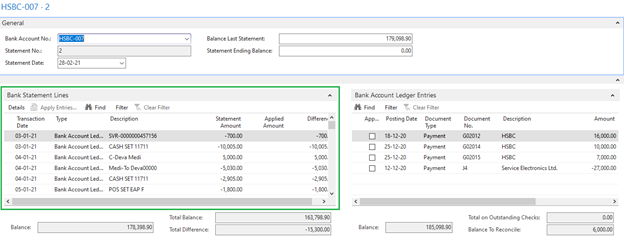
Image references took from Dynamics Navision 2018.
Author of Get Basic Idea – Knowledge Base / Business Analyst – Dynamics NAV.