Let's make a roof for your house in Minecraft and let's find out about several roof designs that you can use.
You might have already built your house with some kind of wood. You can now start with building a ceiling with the same kind of wood. Then, using steps of a different color, put them along the house's outside. Place any block on the inside of the steps after that. Do these steps several times until you reach the top. At the peak of the roof, arrange the stairs in a square.
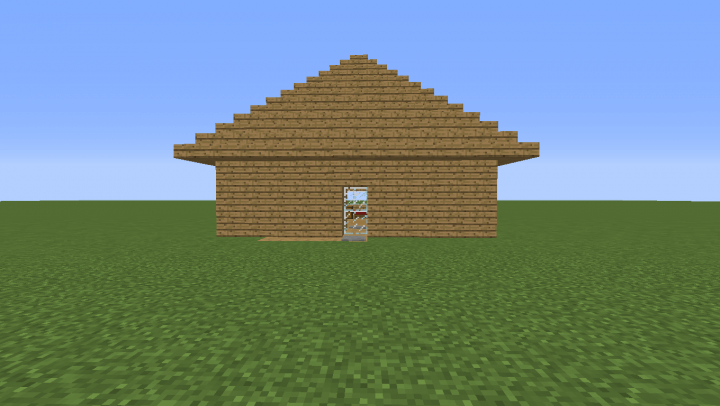
This is the simplest roof design that you can make in Minecraft. There are several parameters that you can change to make your roof design unique. Let's find them out.
Roof height
There are several methods to change the roof heights. It can be changed either by altering its pitch or by including a parapet or a walkway at roof level. The following picture shows the impact of changing the roof height of one building part in comparison to another.
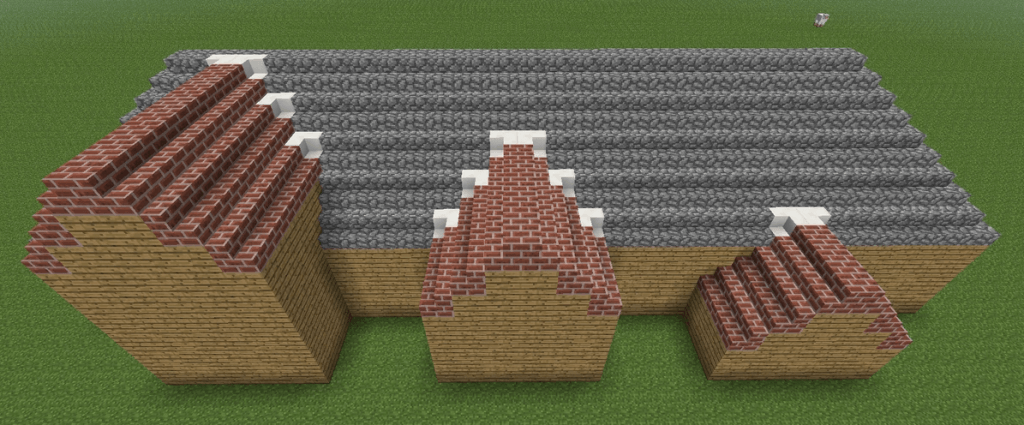
In this picture, the side extensions have heights of two, four, and six blocks, while the main building's walls are four blocks high.
Joining Roofs
The fundamental roof designs can be combined relatively easily. To create a genuine appearance for larger buildings, it is necessary to mix various roof styles. Depending on roofs being combined, the combination formed when roof sections are joined together is referred to as a Cross–Gabled or Cross–Hipped roof. The compound roof typically has a T- or L-shaped design. There may be some other shapes too depending on your choice.
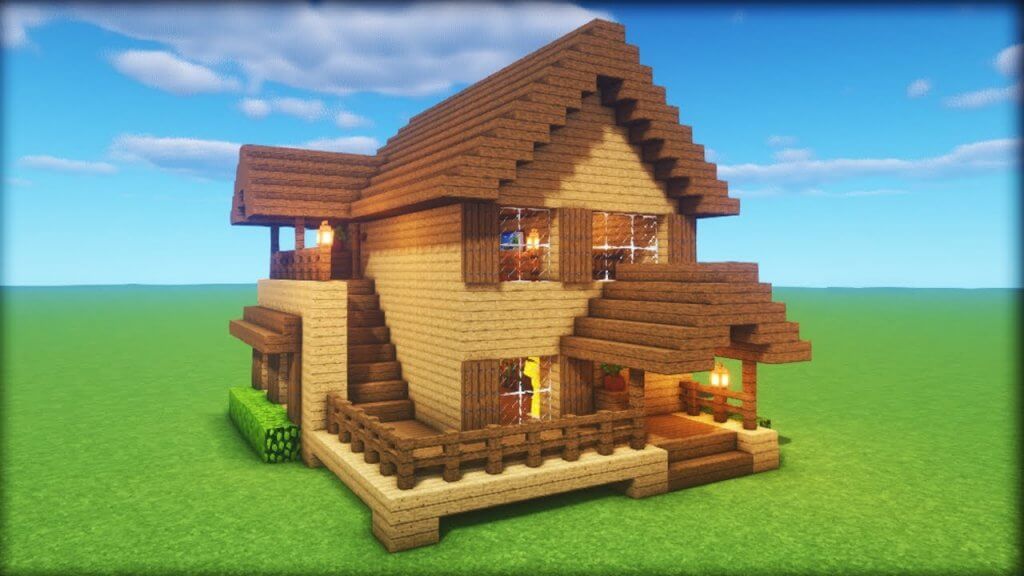
Large buildings must have several roof parts to avoid an odd appearance. As a result, you will need to construct numerous roofs for various building components and connect them. Here are some steps to make an attractive roof.
- Build the topmost roof part first, as though it is going to become a standalone structure with no attachments to other roof sections.
- Do the same thing with the second-highest roof.
- But where it meets the tallest roof, an appropriate join should be made.
- Roof connections can be completed block by block.
- If the roos are made with different pitches, the joining should be done block by block.
- Keep on building roof sections from the highest to the lowest.
- Remove any extra roof blocks once the entire roof has been constructed. It's easier to do this from inside the building.
Roof blocks inside the building will be taken out at the final building stage since roofs often join along a line that forms a V shape. It is simpler and faster to avoid placing unnecessary blocks in the first place. However, it is always easier to construct the complete roof first and then eliminate any extra blocks later when working with complicated roof structures.
Roof types in Minecraft
Several types of roofs can be seen in Minecraft. Here is a list of them. But, you can use a different style as your wish.
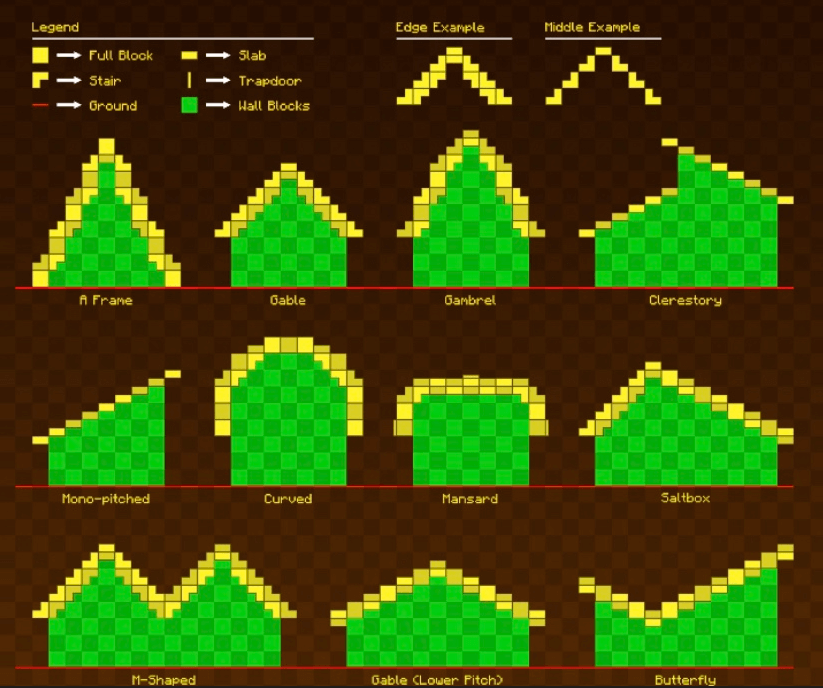
- Flat roof
- Terrace
- Shed roof
- Gable roof
- Salt box roof
- Clerestory roof
- Hipped roof
- Half-hipped roof
- Dutch gable
- Skillion roof
- Gambrel roof
- Gull Wing roof
- Mansard roof
- Bell-cast roof
- Saw tooth roof
- Monitor roof
- Helm roof
- Butterfly roof
Visit the previous guide about how to reload chunks in Minecraft.
Author of Get Basic Idea – The Knowledge Base / Bachelor of Technology – BTech, Mechatronics, Robotics, and Automation Engineering.